
 Not really a recipe today but one that needs to be shared for those who haven’t experienced this gem of a food.
Tallow Tallow is a rich source of conjugated linoleic acid (CLA), an essential nutrient with anti-inflammatory properties. Grass-fed tallow is also rich in fat-soluble vitamins like vitamins A, D, E, and K, as well as omega-3 and omega-6 fatty acids. Used in cooking and skincare this nourishing food deserves a comeback not least because it contains essential fats for our health ( including our hormonal balance!!) but it has many uses around the house. It’s a local food that we need to embrace again! Please do check it out! Beef suet does not look appetising in its original state. But its really good value to make into tallow and use for cooking. Chop it into small pieces and melt in an oven proof dish. Strain through a metal sieve and cool. Oven chips cooked with tallow and served with sea salt… you will thank me..! Anne Maher
0 Comments
 A simple recipe for those hot days…
Raspberries are overflowing in my garden at the moment, and there's no better way to enjoy them than in a quick and easy summer dessert. When the heat is on and you want something refreshing yet satisfying, this recipe comes to the rescue. With just a few ingredients and minimal effort, you can whip up a treat that’s simple to make and sooooo delicious!
Anne Maher  I made these ice pops recently. They are packed with goodness and the real bonus is my kids love them and they are easy to make!
Recipe
Method
Danilly Carvalho 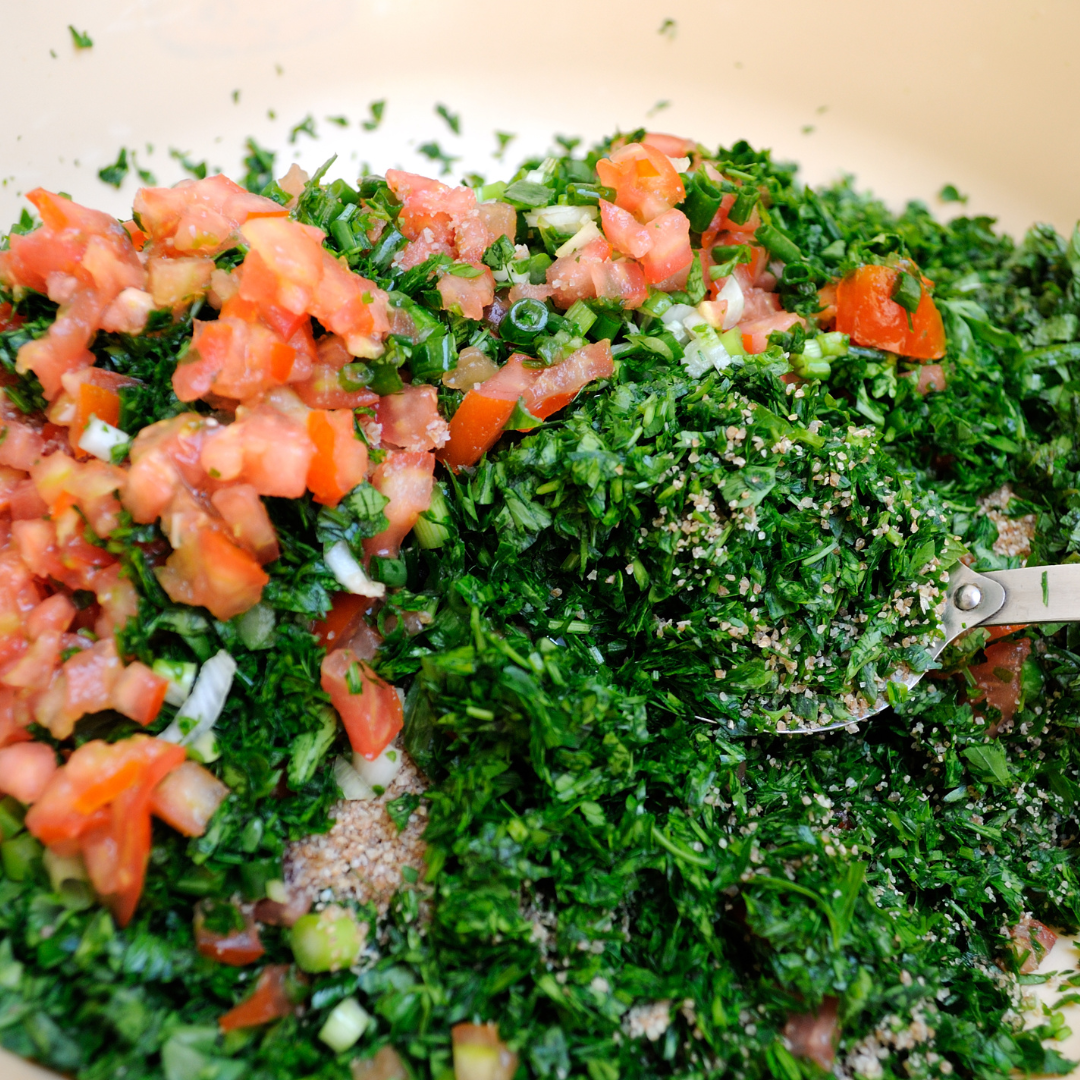 I am sticking with the simple recipes to tackle the glut of flat leaf parsley I have at the moment.
Flat leaf parsley is prolific and nourishing. Enough said. Time to move over as a garnish and take centre stage. Some ways to use it!
Ingredients
Method
Note: The original tabbouleh uses bulghur wheat. Anne Maher 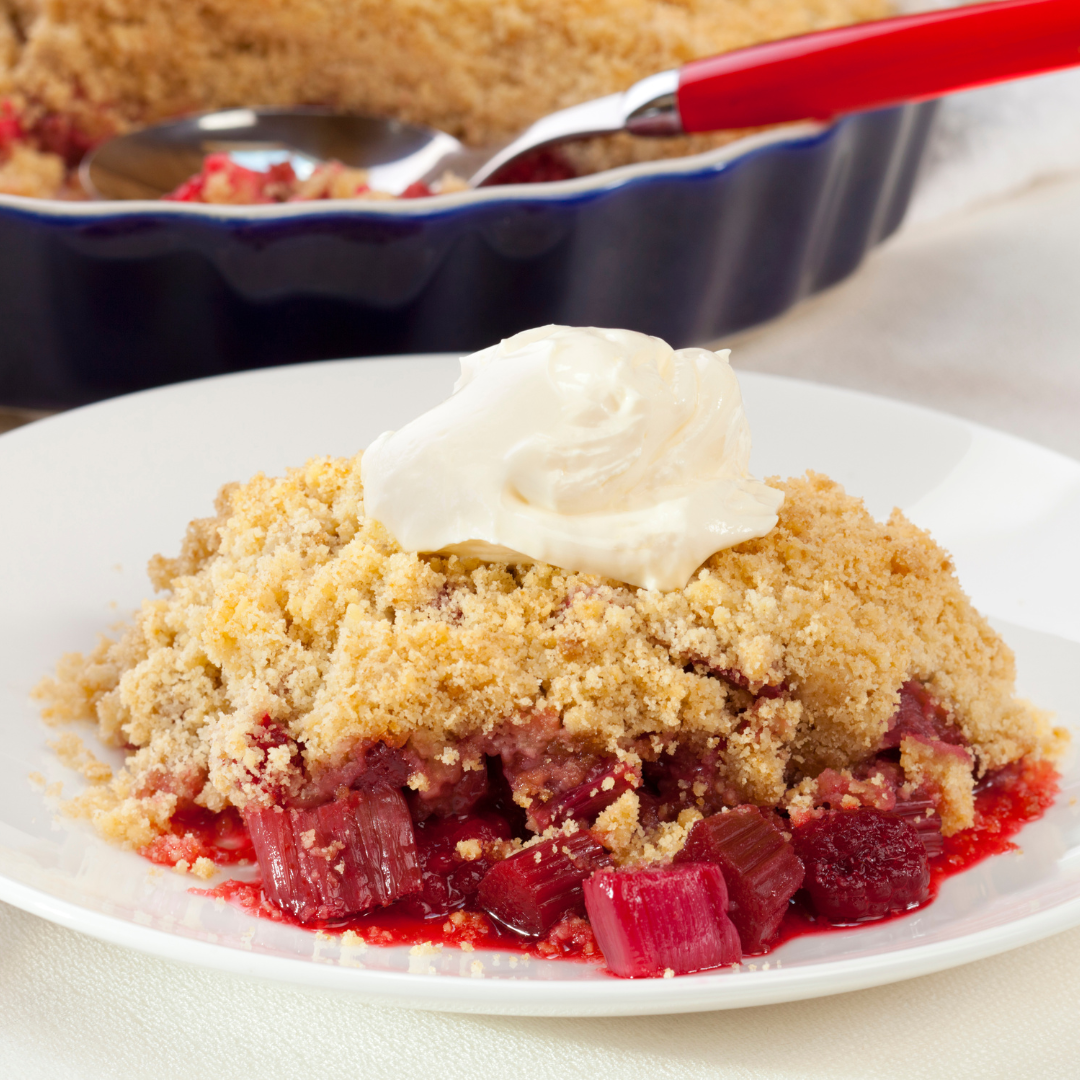 This is my go to dessert always for gatherings… you cannot go wrong. I like to change it up a bit with our ingredients here at The Urban Co-op. Here is my latest version. I really do not measure quantities so these are estimates. The crumble is quite sweet trust me!!
Ingredients & more
Method
Anne Maher 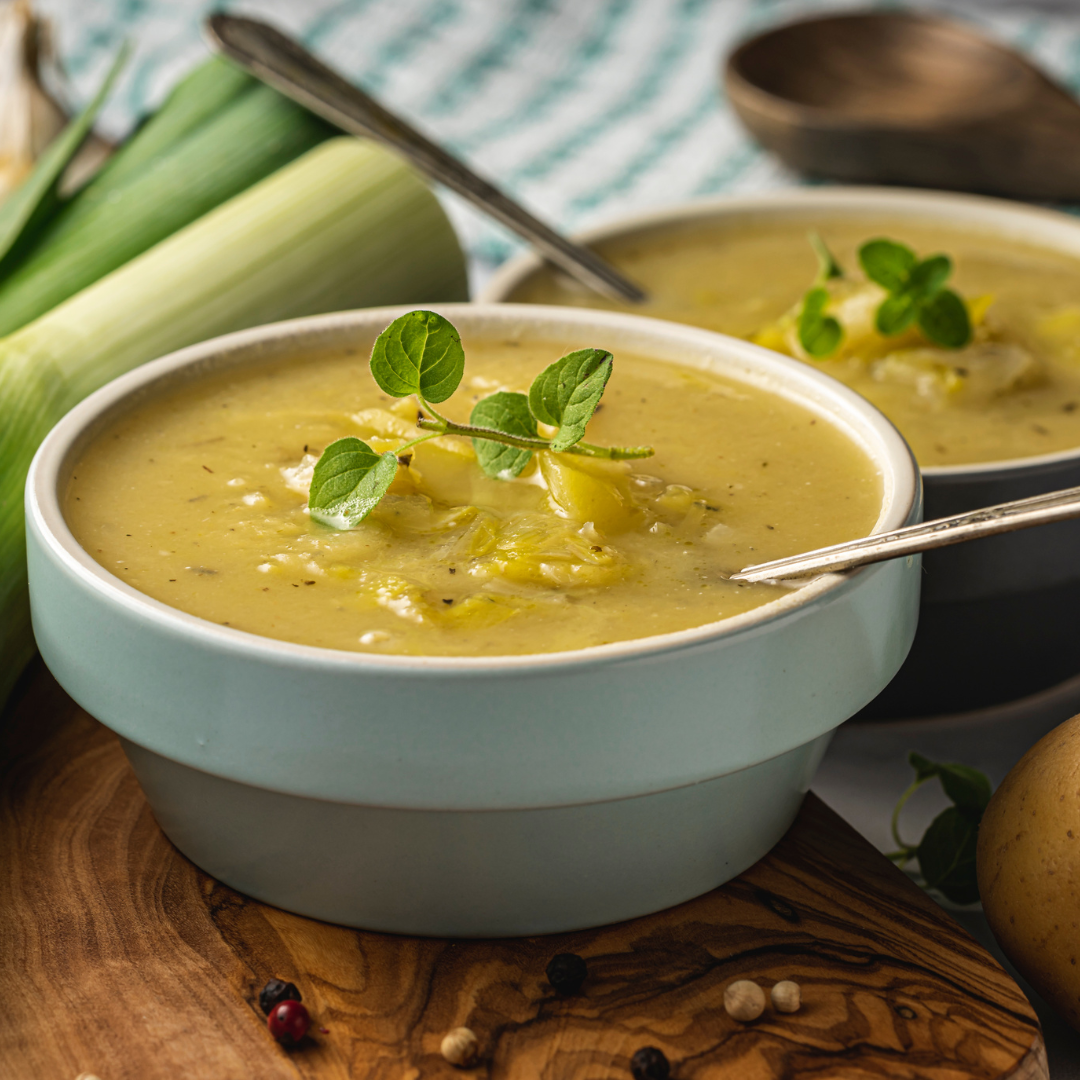 This recipe is a staple and one that you will often see on the menu in cafes and restaurants. From the nourishing traditions mentality, I now see soups as a vehicle for goodness so it can make the most of what you have, you can hide lots of “extras” in it for fussy kids, the possibilities are endless! Leeks are in season in March – a winter hardy veg they are underrated for their immune-supportive properties. They withstand tough weather conditions so their robustness is a clue to how important they can be in our diet. We do of course recommend organic where you can! There are many versions of this recipe. Of course, you can substitute ingredients as you wish. This is how I make it…
Saute the veg in the butter for a few minutes in the saucepan over medium heat. Stir to prevent leek burning which it can easily. Add the stock and bring up the heat. When it comes to the boil reduce the heat to a simmer and cook for about 15 – 20 mins. Blend until smooth and add cream salt and pepper to taste. Sourdough croutons, bacon bits, peanut rayu, and chopped herbs can add different dimensions of deliciousness to this staple…! Enjoy! Anne Maher 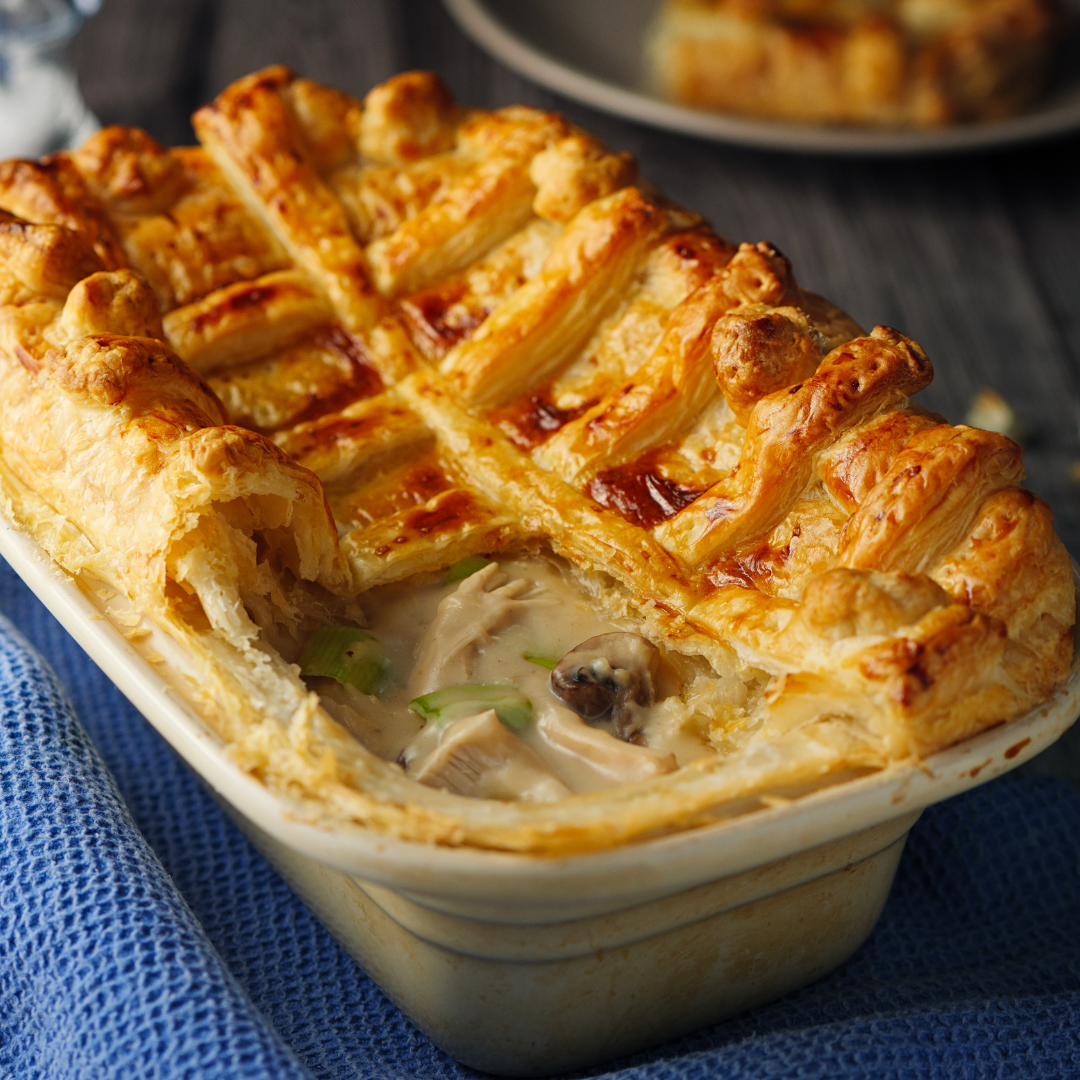 This is such a comfort food and a favourite in our house. You can serve it with potatoes or rice, whatever takes your fancy. I often omit the cream, cornflour and pastry, and use less stock. Sometimes I will put in mushrooms!
Serves 4. Oven 200◦C / 400◦F / Fan Oven 190◦C / Gas 6 Ingredients
Method
Geraldine Fitzpatrick 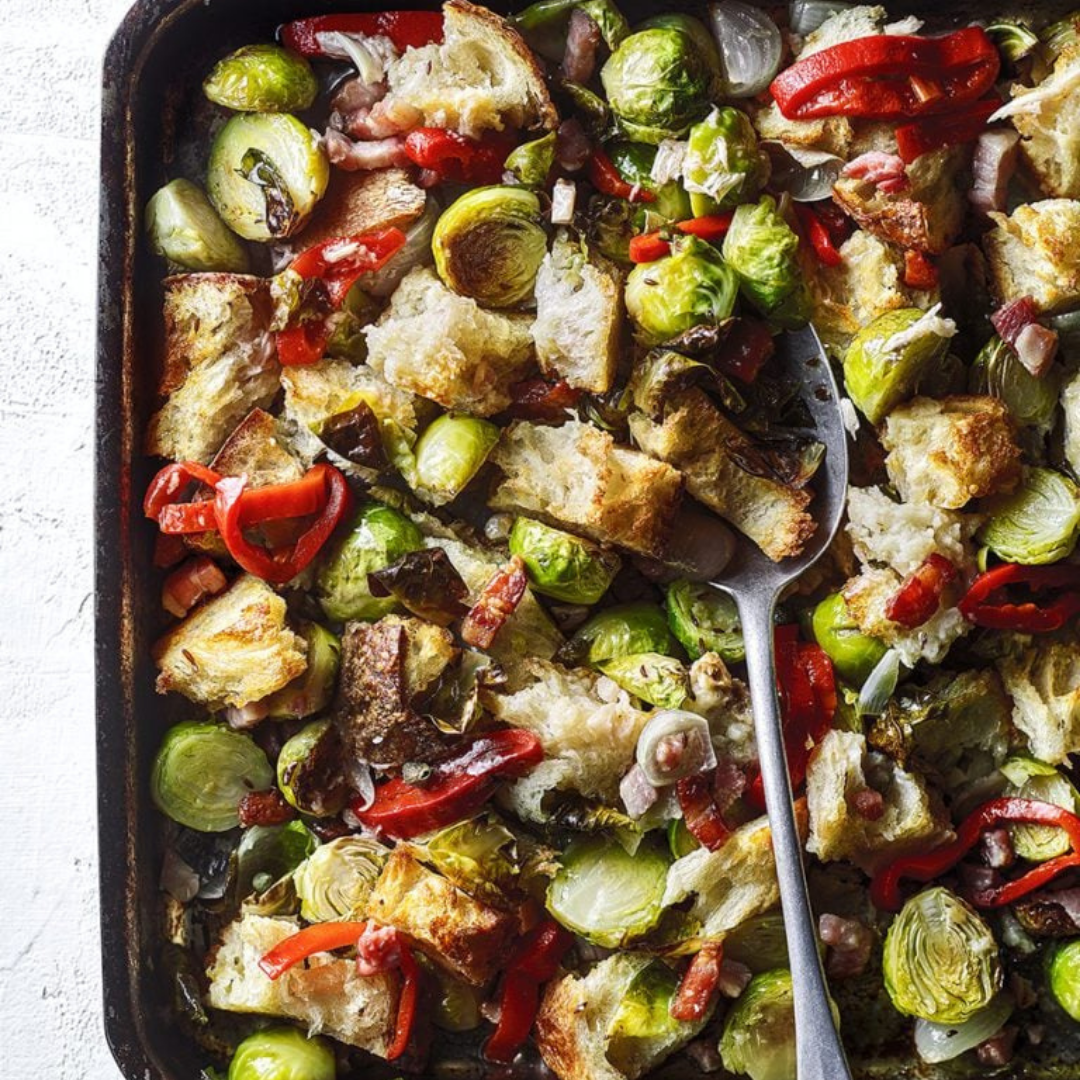 Here’s a recipe I found in the Delicious magazine and it appealed for a few reasons. The Italian influence (Gianni will love it…) but also the concept of using up leftovers. I love a tray bake.
Ingredients
Method
Anne Maher ©Recipe and photo credit to the Delicious magazine |
Categories
All
Archives
July 2024
AuthorsRecipes from Katie Verling & Jacques |
 RSS Feed